Pages

Tuesday 13 November 2012

Mudroom Make Over : Part 1

I know that I am very fortunate to have a large entry to our house, room to take off wet/snowy coats/boots, room to keep the stroller inside etc but often it feels like a waste of space.

In attempts to finish up smaller house projects so that all renovation energy can be focused on the kitchen. I have started to do something with the entry room.

Its a room thats approximately 11 feet by 11 feet, it seems hard to focus just on storage of coats/shoes and all the other junk that accumulates as you enter/leave the house (grocery bags, tools, things to be returned, garden related items, etc). So I have decided that this room will hopefully also one day work as a home office type space, somewhere to sit, keep some files, store some books, crafty things, etc

Step one was trying to reduce the un-necessary stuff in this room, and then I painted it. My plan was to have this part finished in October. I still feel relatively on-track seeing as its not yet the middle of November, and lets be honest its hard to get stuff done during nap time.

Before Pics:


After Painting and a little rearranging/purging:
(ok, there is actually a little bit left to paint, and I actually didn't paint behind the blue storage unit.......but I am so close and I figured if I didn't post this right now.......it might have taken me another month!)


I also quickly painted the door charcoal grey. I love it..... from a distance, up close I know I will have to do a better second coat in the spring, when I can remove the glass insert to properly paint around the faux french door details.

Part 2 plans include:
- replacing the blue storage unit (which very clearly does not go in this room any more) with a wardrobe unit to store coats/shoes/hats etc as well as the vacuum I am sure more than I can imagine right now.
- An upgraded bench with storage (the shelves that are there now are just a place holder and are currently working quite well)
- a shelf to keep some of our books (ideally close to the ceiling to maximize use of wall space, plus they aren't accessed very often anyways so its ok if they aren't within arms reach. At least having them out on display will make them easier to access than having them in a pile on the floor of the spare room or still in boxes)
- lower hooks for my daughters coat and other bags etc.
- microwave relocated to the kitchen (although I have no idea where that will go exactly)

Part 3 plans (which might all be part of my dreams and not reality) include:
- removing the built-in closet (which is behind the door when you enter the room)
- adding a desk in its place with some built-in storage for files, and other office-y type stuff.

My hopes is to have Part 2 finished by Christmas. we will see how that goes seeing as its only 6 weeks away.

oh, and I want to replace the light fixture too, but I don't think I am willing to go out specifically to buy something so I will wait for awhile and see what comes of that.

- Lauren

Monday 1 October 2012

Stenciled Floors

When my cat made an end to our hallway carpet - I used this as an excuse to finally rip up the old carpet (which I have wanted to remove for years).  In a dream world I would like to put down hardwood floor in the hall and bedrooms, but in reality that will have to wait a few years. I didn't want to put down more carpet, and laminate seemed like a short term solution that I would rather not spend the time or money to install. So I painted the subfloor and then stencilled it.

First I primed the subfloor


Then painted it light grey


And finally stencilled it


Is this an acceptable short(ish)term solution? I am glad I don't live in a new house because I think I can kinda get away with this.

Now the final question is what to do with the baseboards - they are currently too high, but do i remove and reposition them lower? add some quarter round? upgrade to something that matches the main floor (and original trim in the house)? I don't want to spend money that will essentially be thrown out when we do eventually put in a 'real' floor. So I think for now I will just live with it the way it is until it bothers me too much.

- Lauren

Friday 10 August 2012

DIY Roman Blinds

Inspired by a friend who recently made roman blinds for her new cottage, I followed the same online blog tutorial and made some for my guest room.


They are alittle too narrow and probably hanging too far out (since I just hung them from the existing curtain rod). But they are much better than what used to be there and I didn't have to buy any new material. I figure I could just add some black trim to make them wider if necessary.

- Lauren

Friday 3 August 2012

Thoughts on Cloth Diapers - 1 year later

Last year I wrote two posts about cloth diapers and my review of them. So I thought I should give a follow up a year later and how I felt about them.

We have 3 kinds that use an outer waterproof cover:

-prefolds with snappi's
- sandy's
- kissaluvs

and gro-via all in ones.

My favourite cover is Thirsties, and when we bought the larger sizes we only bought this brand. The velcro seems to be wearing abit on these guys but still working fine. My advice is to close the velcro each time when washing, I assume this would increase the lifespan.

We also use wool covers at night, we don't use them during the day because they are alittle more cumbersome and also they need time to air out between uses so only at night works well for us. They also cost much more than other covers so we only have 2. I like them for the breathability. But this also means you can smell pee sooner than in a plastic type cover. I am always amazed that the wool doesn't feel wet or leak.

The prefolds are alittle harder now that my daughter doesn't like lying down much, this makes changing diapers alittle harder sometimes and thats my only complaint with them. Don't follow Bummis method of these diapers, use snappi fasteners.

Sandy's are great, no complaints, they are my favourite

kissaluvs, I don't like how they fit my daughter now that she is bigger, they are very similar to Sandy's which I like much better. They have a different layout of snaps which is the biggest difference.

Gro-via are showing considerable wear along the edges of the diapers. Not sure how many babies they will last for. Because of this, I wouldn't recommend them which is too bad because they are the easiest to put on while my daughter is standing up. These are also the most streamlined of the ones I use. A friend of mine also uses these and hasn't had this problem, so maybe its just me but I am not sure what the difference is......

All the diapers and wipes are showing minimal staining. I haven't done anything to specifically treat any stains although I hear that hanging them outside that the sunlight does wonders. Stains on diapers don't bother me especially since they are covered.

We have used disposable a few times on trips and I still return to cloth when we get home. Sure its an extra load of laundry every 2 or 3 days but since I seem to do a load of laundry every day its just part of the routine now.

(The only thing that might be an issue is poopy diapers, these are not fun, but more on that later.)

After using disposables the best part of returning to cloth is probably the wipes. Cloth wipes are far nicer to use than disposable (in my opinion) and disposable wipes can be expensive! The cost of them adds up!

- Lauren

Tuesday 12 June 2012

DIY Swing Set

For my daughters upcoming first birthday, my dad built her a swing set in our yard. Not your usual kit from a big store, but just some pressure treated lumber and a shovel.

We bought three ten-foot 6x6 pressure treated pieces of lumber. He knocthed them where they will join at the top corners and used two bolts to secure each corner (only attached one until the posts were in their final position)

He dug two holes alittle over 2 1/2 feet deep with a shovel. It was pretty impressive, and it was interesting to find out that our yard is very sandy.

So about 4 hours and 4 pots of tea later, all we had to do was wait for the cement to dry and get some swings to hang.


- Lauren

Monday 28 May 2012

Rhubarb Tarts

It's rhubarb season and who doesn't love a good rhubarb recipe?  It seems only fitting that Rhubarb Diaries would have a rhubarb recipe, right?This simple one is a favourite around my house.  Eight years ago when we moved into our house, my friends' mom sent these tarts over.  We quickly asked for the recipe and have been making them ever since.


Rhubarb Tarts

for a dozen (or so) tarts:

3 1/2 cups chopped rhubarb
1 cup sugar
2 tbsp. flour
1 egg (slightly beaten)


Mix well and place into tart shells
 (you can make your own or buy the pre-maid frozen ones - that's what I use!)

Bake at 375 degrees for half an hour or a little less.

Enjoy!

- Carrie

Tuesday 8 May 2012

Jewelry Storage


A few years ago I got a mug stand to use to hang my necklaces and bracelets from. This has worked okay, but I never really knew where to display it. There was never enough room in the bathroom, and I don't currently have a dresser. Also it seemed to be a mess so you had to remember what necklace you wanted, so I generally just wore the same ones all the time.

In my bedroom, there is a narrow section of wall in our bedroom between two closets which I have been thinking about how to use it for about 5 years, I had always kept my eye out for a narrow mirror, until I came up with the idea of using a shutter to hang my jewelry on.


Last week I found the perfect shutter from Timeless Materials in Waterloo. After a quick wipe with a damp rag, I hung it on the wall. I also put some screws in to position the shutters at a good angle so that I could hang hooks from.

I guess it should be no surprise that I wear similar colours to those that I decorate with.  I love the result and and I can easily see options as well as remember events that I wore certain ones to.

Now the only question is will my necklaces end up on the floor?


- Lauren

Wednesday 2 May 2012

Bathroom Upgrades

Its been almost a year and a half since we started our bathroom reno's

This involved ripping everything except the bathtub and surround out. Luckily we have a second full bathroom on the main floor.

The original bathroom when we got the house about 8 years ago had an avocado tub and toilet, dark green wall paper border and sliding glass shower doors. I can't remember 100% but I think it was painted baby blue. (unfortunately I don't have any pictures)

Back in 2007, I removed the glass shower doors, removed the wallpaper and painted the room yellow. This satisfied me for a while. (I couldn't even find pics from this either)

Then in 2008, we replaced the bathtub and surround. (still no pics.....)


Finally in 2011,
- we replaced the vinyl flooring to heated faux slate tiles (heated floors are amazing)
- replaced the green avocado coloured toilet to a dual flush white model
- replaced the light fixture and added a second light to the shower area.
- added an exhaust fan
- upgraded the window
- we designed and had the mirror built
- we designed and had a new vanity custom built for maximum storage and for our new 'wetstyle' double faucet sink.

The room has been so close to being finished for about 6 months now. In March we finished installing the trim and last month I finally caulked it.

We have plans to do a tile backsplash, we have even bought the tile. I guess this is probably a project we should do before the kitchen is started.......perhaps this will motivate me (us).

Does it take anyone else this long to finally finish stuff?

- Lauren

Thursday 26 April 2012

Simple Sewing


So a few months ago, I made my niece a baby sling for her doll. (A sling, very similar to one her mom has)
This was an extremely simple sewing project. I literally took a piece of fabric, folded it, and sewed the edges together to form a circular piece of fabric. The end result, was a really cute way for my niece to sling around her doll (I wouldn't trust my sewing to carry an actually baby in the sling, but a doll... absolutely!)


what a cutie!


- Leah

Sunday 22 April 2012

Gardening in April

Before this year, I always thought of the May long weekend as the start of gardening season. This year after reading that you can start to plant some things as soon as the dirt is workable, I did alittle gardening in March.

It turns out that it was a little early for peas and spinach - or was it the fact that I didn't water them?
Luckily, I didn't use all the seeds - so here goes round two of planting peas and spinach.

But my onions are sprouting! 3 or 4 inches out of the ground. I can't wait to eat them!


- Lauren

Friday 13 April 2012

Kitchen Progress

So I've been thinking about kitchen layouts for about 6 months now and finally thinking I had figured out the best one.  I even marked the floor with masking tape to see where things would move and to be able to see the distance between moved items.  However, I am once again not 100% convinced that its the best for the space.......


In the mean time, I have started painting the walls, since we plan to open up the space to the living room, and since I never loved the orange colour I painted 5 years ago.  I used leftover living room paint to get me in the right direction.  I just did a quick coat for a general vibe.  I don't love the colour, I think its too plain.  It looks pretty good with the white trim, but not great with the wood cabinets or ugly backsplash - both which are going to eventually be replaced.  My next painting project is to paint the adjacent basement stairs area charcoal grey to see if I like the two colour combo.

Also in kitchen reno baby steps, we replaced the light.  The lighting in the kitchen was awful.  You couldn't tell if it was even on or off during the day.  At night it created all sorts of weird shadows and never fully lit the room.  We choose an inexpensive one from Home Depot.  Even if we don't keep it, I won't feel like we wasted any money (plus it could move rooms or we could sell it on kijiji).


Finally we replaced our leaky Kohler faucet.  We debated trying to fix it or get it replaced since apparently it has a lifetime warranty.  I knew I wanted a new faucet in our 'new' kitchen one day, so this seemed like a good time to upgrade. I wanted something with a higher faucet. And my husband wanted a pullout, instead of the side pullout.  We bought a Grohe which was almost 50% on sale (we still plan to fix the Kohler, it seems to have been leaky due to a lot of hard water buildup and it might get put into the laundry room but maybe its too nice to go there).

And finally, I have a new kitchen layout.  It's just a rough sketch but it has some improvements from the previous one.  It has more prep space.  It has a small moveable island/cart plus a table.  It would mean opening up the existing window into the living room instead of fully removing the load bearing wall (this seems cheaper.....).  I am not sure if the table would impede the traffic flow in and out of the doors too much or if it would be fine as long as the chairs were tucked into the table.


I know that I need to finish some other projects before diving into this one, but I think there might be some cabinet removal or bulk head investigation soon (I want to see if there is something in there or if it will be possible to remove them) - I just need to convince my husband to help!

- Lauren

Wednesday 4 April 2012

Kitchen Plans

I spend alot of time day-dreaming about our kitchen possibilities. I am trying hard to keep the focus on finishing other projects before starting any new ones, but we all know that one day there is gonna be something drastic done during nap time. Cabinet removal? Fridge moving? Who knows what its gonna be.

The first step was figuring out the new layout. Here is the current state:
(yes, done on graph paper, each square is one foot)


Some good things about the kitchen is the storage.

Some things that could be improved:
- counter prep space
- lightening
- space for a table without hitting the fridge
- room to open the door to the basement
- more open-ness to the rest of the house so that you aren't stuck in the kitchen when people are visiting.
- take advantage of the unused front entrance space behind the kitchen.

After many attempts, this is what we came up with.

Open up the wall behind the stove and take advantage of the unused front entrance. Although this means you are walking right into the kitchen, since we don't use this entrance we are treating it more of getting more window light. (this is not a load bearing wall)

Currently there is a small window opening in the wall to the living room, we plan to open this up quite a bit - this will be more work involved since it is a load bearing wall.


We plan to have no upper cabinets along the sink/dishwasher/stove wall. This should make it open, especially with all the windows (yes, there was a window in the front door closet - weird).

Basically we are switching the 'pantry' wall from the first sketch with the fridge&cupboard.
And then taking the stove section and swinging it 90 degrees to be inline with the sink.

This means that we are approx same cupboard space. More useable counters (no corners which are pretty much wasted - same as counter cupboards, currently ours is pretty sparse)

Since the front door is going to open into the kitchen, I think its good to have a coat closet there - as I said we don't plan to use the entrance or store coats there but for resale somewhere down the line, we will use this as a huge pantry.

People always say you need your fridge, sink and stove within such and such a distance, I don't think our plan quite meets those rules, but this is almost the same distance/layout of appliances as my parents, so I feel good about it.

So what do you think about the layout? anything I am overlooking/forgetting something?
All Opinions are wanted - this is a big project, I don't want to have overlooked something.

- Lauren

Thursday 22 March 2012

Gardening in March?


Over the years, I have slowly been improving my vegetable gardening skills and knowledge.  Mostly I have learned from trial and error.  So far its worked out well for me.

Last year we built two raised gardens.  I like the concept of raised beds for a few reasons:

1.  Ascetically I think they are neater.  You don't have to worry about weeding around the edges, grass creeping in etc.
2.  It prevents you from walking on the soil which means that its not all packed down - this means that things can grow easier.  It makes pulling weeds easy too.
3.  Since you aren't walking in between rows of plants, you are leaning over and you can plant things closer together.  I have loosely followed the 'square foot gardening' ideas.

After some planning about what to plant this year, I learned that you can plant a few things as soon as the soil is workable.  They will survive with minimal frost.  This week I planted onions, spinach and peas.

Some of my perennials from last year include: chives, garlic, strawberries, sage, oregano and thyme.  It looks like parsley made it through the winter which is rare.  I don't think my rosemary made it.  I also planted some asparagus last year, so we will have to see if it came back - although it will be a few more years before we get anything to eat.  Other food in the yard includes: rhubarb, mint, raspberries and cherries.

Anyone else started playing in some dirt yet?

- Lauren

Tuesday 13 March 2012

Forcing Spring

We have had a very mild winter, and it has felt like spring many times the past 6 weeks or so, I think we are almost there but I couldn't wait any longer. I cut some forsythia branches from my yard, put them in water and in a sunny window and waited for spring to bloom inside.

After some googling alittle, some people say to cut the branches under water, some say cut up the stem, or bash the stem (which is very woody). I just cut them outside and came in put water in a vase and placed them inside. Maybe you would get faster results with some tricks but I didn't use or need them.

I think it was my parents who mentioned doing this, it seems to be pretty common with forsythia which is one of the first bushes to bud in the spring. Its the one that flowers first with bright yellow leaves and then turns green for the remainder of the year.

Here are some pics after 4 days: finally starting to see some buds doing their thing.


After 6 days: green & yellow everywhere almost ready to open up.


Today, day 7. I woke up to open yellow blooms! 


I think tomorrow (and the next week or so) will be more and more yellow!

-Lauren

Wednesday 7 March 2012

Bathroom Ceiling Transformation


Unfortunately I don't have a 'before' picture, but our bathroom ceiling was pretty gross.  There is no exhaust fan in there.  It had probably been painted with the wrong paint and was peeling, discoloured, uneven and all around gross.

Since its not our primary bathroom, we decided not to install an exhaust fan.  Plus, there is a window if necessary.  I told my Dad that I was thinking about tin tiles.  I thought it would be a good room to do it in since its small and wouldn't cost too much or be too much work installing.

One day he came over with a roll of wall paper - from the discount bin. It had only cost him $5! and he even installed it for me. I put up the trim, caulked it and painted the whole thing - and I love it! I didn't think it would be as obvious as it is - but a lot of people notice it when they come over.

I am glad that my dad was doing the wall papering and not me.  It definitely takes some skill (he has done alot of wall papering over the years) and the ceiling was extra fun since gravity was working against us.

-Lauren

Wednesday 8 February 2012

Good-bye Milk Box

As convenient as it to have a milk box, leaving things for people to pick up if I am not home or having a place for delivery of a package. And it would have been ultra-convenient to have milk delivered (when did that stop?) But currently its very drafty. We are participating is the Government of Canada ecoENERGY program and for part of insulating the house we are also sealing holes etc.

Here are some before pics of the milk box (both from the inside of the house)


and now the work to seal it off

1) cut the dividing shelf (it allowed for mail to be dropped in and only accessed from the inside - but now if the slot is used, we want the mail to still be accessible from the outside since it will be the only access point)

2) Cut a piece of wood to size, I used my new Kreg jig (which I got for Christmas) to drill pocket holes. Then I screwed a screw into the middle to use as a handle. and then screwed it in place. (removing the screw in the middle when done)

3) remove the trim from the inside - ideally with less damage than what occurred......


4) caulk from the outside (maybe i will paint it next summer currently its too cold for exterior painting even if it does feel like spring)

5) patch with drywall and paint with primer.......probably won't get around to painting until we finish the basement and stairway. Patching was a little more work than I think it should have been, my drywall skills are poor, so it took me 4 times, hopefully I improve fast if I am going to help drywall the basement!


One more project that has been completed in 15 minute intervals, sometimes that's all the time you get.

- Lauren

Monday 6 February 2012

Laundry Room Before and After

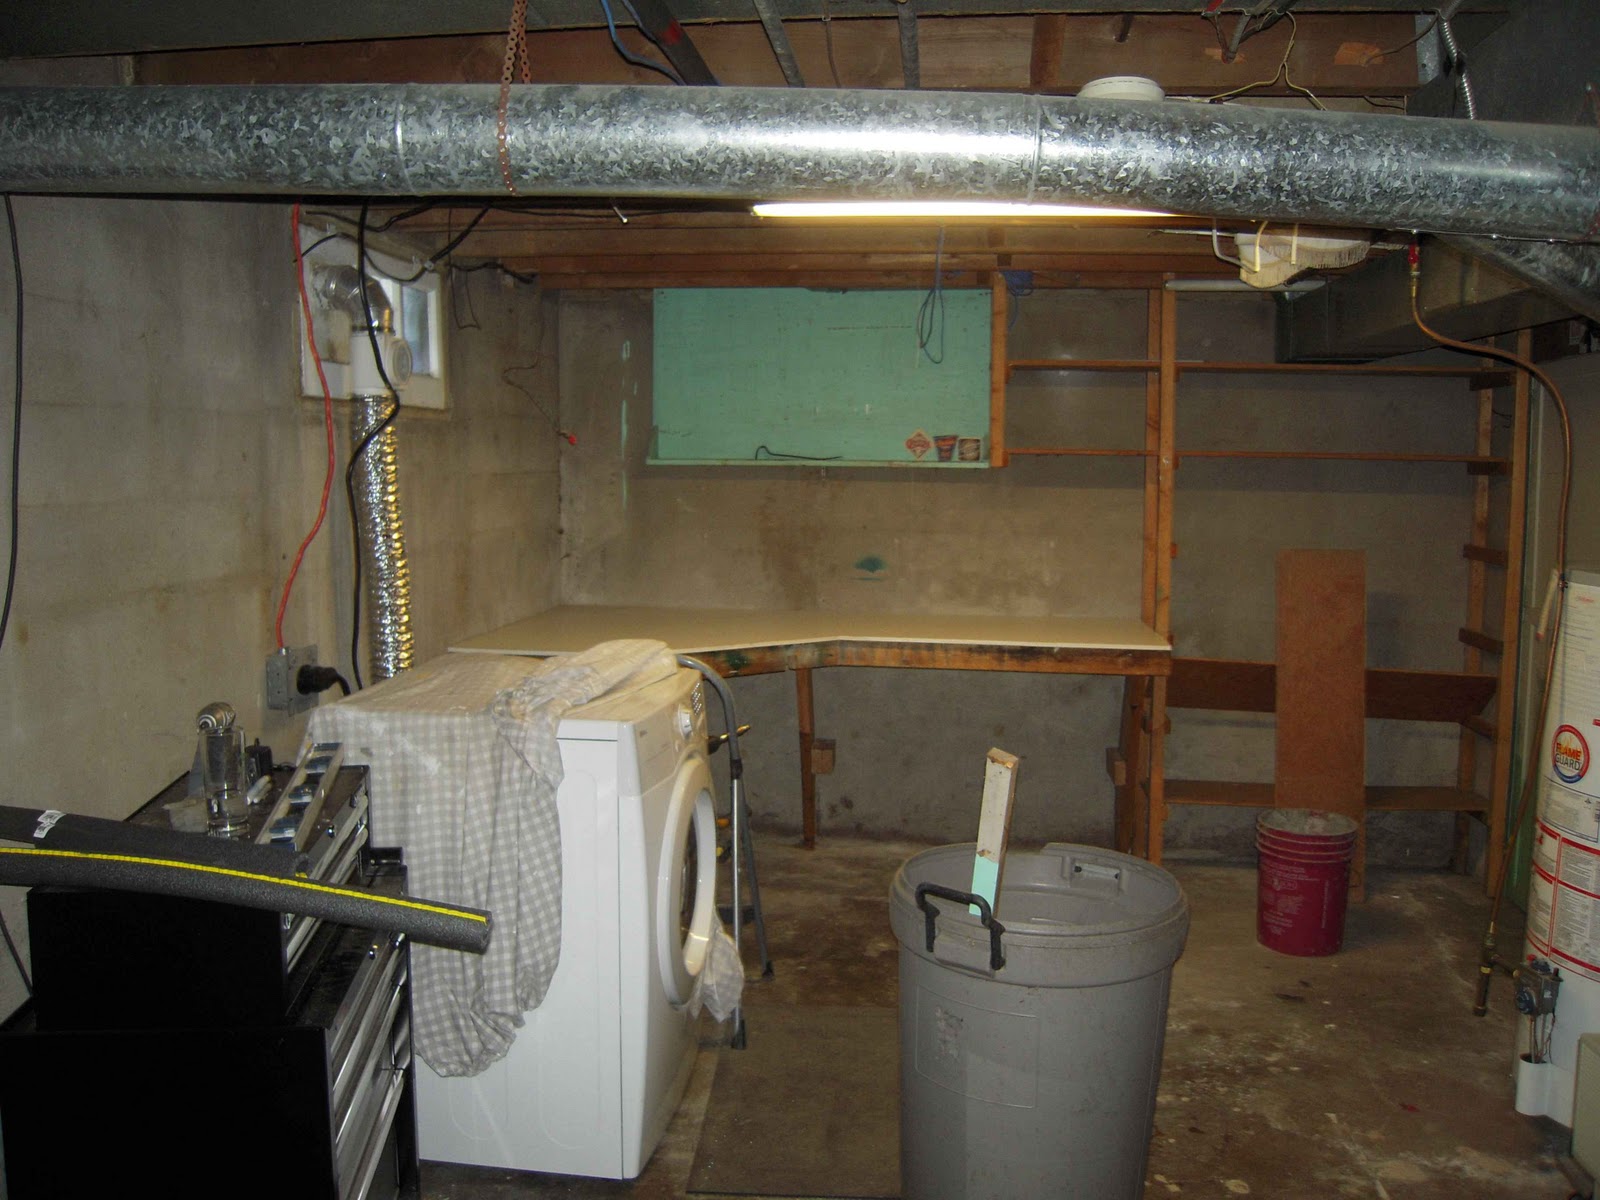
The furnace room of our house is huge (almost 12 by 16 feet), so we decided to move our laundry into that space to allow for more livable space in the rest of the basement. The room started with furnace, water heater, water softener in an un-insulated room.

These before pics show the dryer moved approximately into place, and the water softener didn't move, and a new furnace replaced the old one. Otherwise everything else is pretty much changed/new. (note to self : take better 'before' pictures).
First picture: Looking into the room, furnace on the right and then the water heater (just made it into the pic) and then there is a door past there leading to the cold cellar. On the left there is the water softener, then exhaust going up the chimney and then the dryer.
Second pic is taken standing in front of the cold cellar door looking out of the room (you can see the water heater/furnace exhaust and the water softener in the corner.

So now what we did with the room

When we got the new furnace, we had the water heater moved next to the water softener (under the big water rust stain - I believe this was a result of a old damaged chimney liner, we have a new one so no more damage will continue). This also got rid of the exhaust pipe that went across the room which makes the room instantly feel MUCH bigger.

We used the furnace install as an opportunity to  put down a piece of vinyl flooring. Its cheap, washable, and has no seams to deal with for install. We choose a in store option from Home Depot, the pattern looks like tiles.  We might have been able to get something awesome if we special ordered it but we wanted to take it home with us right away and its fine. Sometimes less choice is better because then you can make a decision faster based on the two available options.

We framed and insulated the two exterior walls. We left the two interior concrete walls as is.  We choose not to finish the ceiling since its a utility room and then we still have access to plumbing/gas/etc.
This could still be done at a later date.

New plumbing was added for the laundry and relocated water heater. This allowed us to slowly start replacing some of the old steel water lines and replace them with copper. They were pretty corroded and we have been told that by replacing them we should be able to improve our water pressure (once the pipes aren't full of gunk).

New electrical was also added for the laundry, dryer and some regular outlets.

While we were doing the work in the laundry room, the rest of the partially finished basement was being demolished. The room had 1inch white styrofoam 'insulation' behind wood paneling. I took this opportunity to put some sweet wood panelling in the laundry room.

1) It was free. 
2) It prevented it from going to the dump. 
3) It was essentially already cut to size.
4) It was easier than drywall since we wouldn't have to tape/mud/sand. 
5) I was going to paint it.
6) Its a laundry room so it doesn't have to be a show room

Result - I love the painted panelling!

I have decided to paint the main part of the basement (currently under construction) a charcoal grey. So I painted the laundry room a nice light warm grey. The two colours are 'revere pewter' and 'kendall charcoal' from Benjamin Moore - and then colour matched and mixed at Home Depot.

The cold cellar door - was doctors office green, now charcoal grey. Love it.


The baseboards are wood, and not mdf, just since there is potential for flooding since its a basement and a laundry room. Once mdf gets wet its over. We bought primed finger joint pine and it seemed in the comparable price range although I can't remember the prices and might have just convinced myself. Buying primed was so much easier. Its pretty substantial baseboards but we are trying to match with the era of the house and the original woodwork on the main floor. (the new stuff is just 1 x 6 's with a quarter round along the floor but its pretty close).

Currently there is a square folding table with some boards on it. Still not totally sure where a table should go in the room. where it is or as a continuation to the sink. So thats still in process. I plan to build some table something with the wood - which matches the shelves on the wall.


We hung some shelves on the far wall. They were in the pile of stuff to potentially be thrown out and so I used them. They have a nice warmth to the stain and work perfectly. The brackets seemed kinda expensive for free shelves but probably still cheaper than buying the whole assembly. (I think they were $9 each).

The stuff on the shelves doesn't look too pretty, maybe I should have opted for closed storage, then again this is a utility room. I plan to get a few more boxes/baskets for organization and appearance.

Hung the ironing board - kinda looks like art. Not a whole lot of ironing gets done in our house but when it does, it will happen in here.


 We used our old dirty laundry sink. We thought about buying a new one but since the laundry room is for messy things like washing paint brushed and etching mirrors. There was no need for a shiny new one that we might be mad at ourselves once we make the first stain. I don't think I have ever soaked clothes in it - which I assume was a previous use. I just put something right in the washing machine if I am worried about a stain setting in.

You probably notice that there is no faucet on the laundry sink. Its not a priority yet, so nothing has been done. I don't want a basic utility one and the thought is to use the one from our current kitchen when we upgrade it. Yes I love re-using thing.

The window should be replaced in the near future, complete with window ledge and trim.

And of course my new etched mirror is hung.


So there is no door yet, we haven't made a final decision about what we will put there, re-use a door from the main floor? buy a new door? make our own barn style sliding door? 

There is still some finessing that needs to be done, but if I waited until it was perfect then you would probably never see it!

- Lauren